The Options are Endless
The Options are Endless
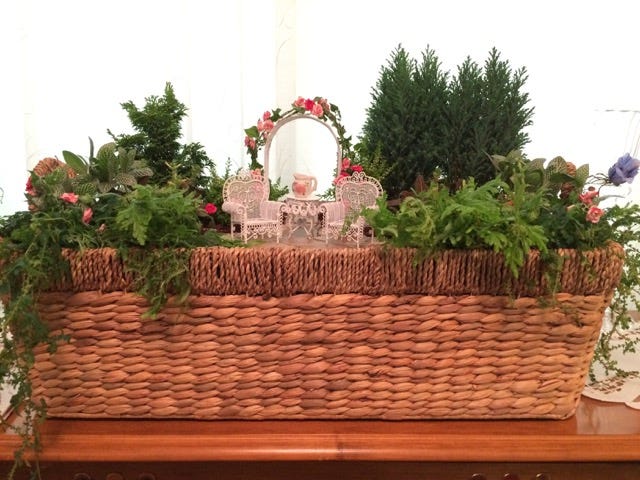
In my last blog, I posted photos of a few of my little gardens and told you I would go into more detail about them. Since fall is rapidly approaching (and, after all these HOT summer days, it will be a welcome relief!) I thought I would start with a fall faerie garden that was really fun to do. The basket in which it was made was 24” long,15″ wide, and 7” deep. Although any size container can be used, I chose this size for the space where it was to be displayed. I use the very best potting soil I can find, in my case it would be Pro Mix or Bonnie Plant mix, both available at our local farm supply store. I always line my baskets with a double layer of heavy duty plastic. We use reenforced tape to keep the plastic in place. Before adding the soil, I usually add small stones to the bottom of the basket for drainage. While this probably isn’t necessary, it is a nice precaution since I have been known to over water!


Another thing that I like to do in my little gardens is to make a “patio”, or large flat surface. This allows for placement of houses, or other figures that need a level base. (You can see this in the photo above.) It also keeps the plantings around the edges tidy. I have used just plain gravel (small!) and sometimes sand, but I really like to use tile pieces. In this basket, I used tile over a paver sand base and then I brushed sand across the top to fill in between the tiles. There is a large selection of tile pieces that are small enough in size to pair well with small gardens. I will show you other ideas in other containers in future blogs.
The plants used at the back of this little showstopper were small evergreens available in the fall at local garden centers. The trailing plant on each side in the front is a moss called selaginella. I have grown several varieties of this over the years; it is one of my all time favorites. In between are small green and white frittonias. I had this basket in bright but indirect light, which seemed to suit all the plants. Care was easy: just mist once in awhile and keep moist. I use a soil meter but, hey, inserting a finger can also tell you if the soil is moist!! (By the way, moist or slightly damp but NOT wet!!)
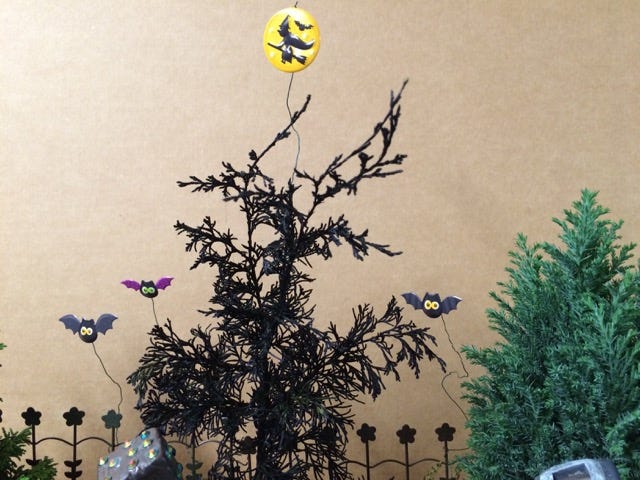
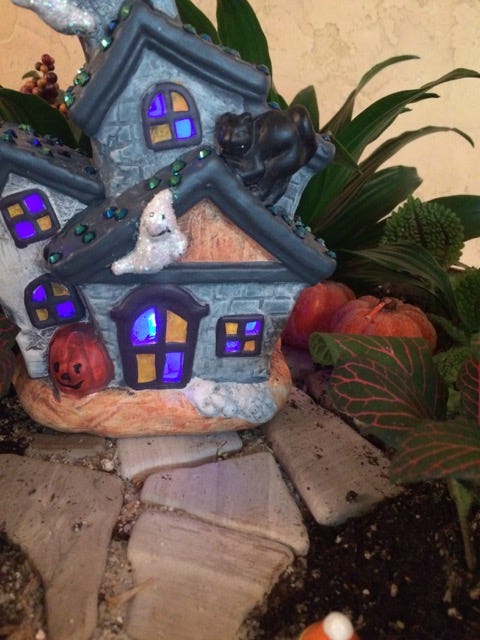

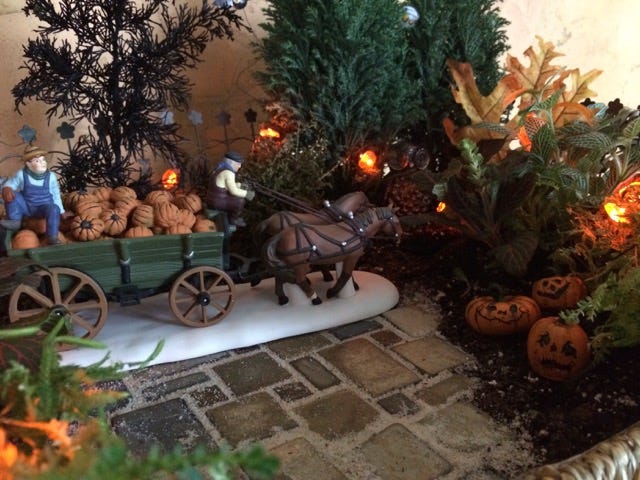
Now comes the fun part—decorating! I put a black metal fence around three sides. When used in this basket I thought it gave it sort of a “gothic” or “spooky” look. Later, when all the Halloween accents are removed, it becomes a formal or Victorian looking fence. Since this was a Halloween centerpiece, I spray painted a small branch black to use as a “dead” tree in the back next to the fence, then attached Halloween stickers, bought at Hobby Lobby, using thin bendable wire. I loved the little bats wired onto the fence, and the moon with witch was just right over the black “tree”. But there were many stickers that I could have used: big eyes and small eyes, ghosts, black cats, spiders and on and on; you are limited only by your imagination. And if you are going to make this with your kids, can you imagine how much fun they will have picking out the stickers? The little Halloween house was very inexpensive; I bought it at Homegoods. It has a battery and changes colors from red to blue to purple to green to pink to yellow. It also flashes—this part didn’t enthuse me but kids love it. I added fake leaves for fall color but it would be easy enough to add real leaves; another fun project to do with the kids. I added small pumpkin lights and finished it by adding small pumpkins. The pumpkin wagon is a Department 56 piece that I have had for many years and it works very well in this little garden. In fact, when Halloween was over, I removed the “tree” and the stickers, and turned the pumpkins so the faces weren’t showing and just used the wagon—it was very attractive.
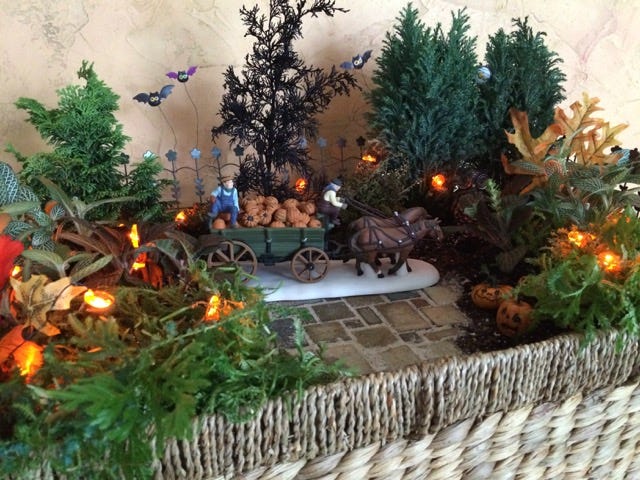
One last comment about this little garden: it is so easy to change for the season or the occasion. Adding accents is so easy! As the last photo shows, for still another look I simply took out the fence and added other accessories. More of my favorite accents in future blogs.